• Call or Text: 303.788.0113
News
  • Home
  • Residential
  • Commercial
  • Our Showroom
  • Blog
  • About
    • Frequently Asked Questions
  • Contact
    • Write a Review
  • Home
  • Residential
  • Commercial
  • Our Showroom
  • Blog
  • About
    • Frequently Asked Questions
  • Contact
    • Write a Review

News

  • Flooring, Hardwood Flooring
  • April 25, 2017

How To Prevent New Hardwood Floors From Fading Over Time

You’re in the process of deciding on and selecting hardwood flooring for your home. Maybe you’re a little concerned because the salesperson told you your beautiful hardwoods most likely will fade over time.

How much? What can you expect?
How To Prevent New Hardwood Floors From Fading Over Time

And will you like the look now and for years into the future?

Remember, hardwood flooring is a natural product. And as such, they will change over time. For hardwood flooring, changes include the color of the wood. Some species of woods will fade lighter whereas some will darken with age.

Sometimes the changes can be so subtle, you’ll barely notice the changes.

Sometimes even the slightest change can be a big concern. To prevent this natural fading process, you must first understand the two factors that cause flooring to change:

1. Exposure to sunlight

2. Stain and finish application

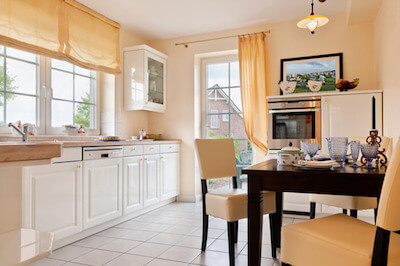
Sunlight is harsh on just about any material. The best way to keep your hardwoods safe from sun exposure is to cover your windows during the heat of the day, especially if sunlight ever streams into your home. Blinds, drapes, or shutters all work well. You can also upgrade your windows to low emissivity glass or apply a window film to keep out UV rays.

Oil based finishes bring out rich color on your floor, but will yellow over time. For some finishes, this may add to the final look. But if you want the original color, you might prefer a water based finish instead, which essentially remains clear the entire time.

If they’ve already faded, you have the choice of sanding them down and refinishing them, or installing new flooring altogether. A professional can help you make your final decision.

Read More
  • Flooring, Hardwood Flooring
  • April 21, 2017

Understanding The Three Phases Of Flooring Installation

Who installed your flooring? Believe it or not, it’s fairly easy to tell whether it was a professional or a DIY job.

Ultimately, it comes down to the details.

With carpeting, for example, seams are not that easy to do, especially if you don’t have the experience and don’t do it on a regular basis. A loose, wavy installation that has not been power stretched can be seen by anyone walking into the room.Understanding The Three Phases Of Flooring Installation

Likewise, with hard surface installations like wood, laminate, vinyl or tile, proper installation includes things like moldings, baseboard work, transitions and more.

Phase One

Phase one includes floor prepping. This is critical to any installation process to ensure your starting surface is clean, flat, and dry. For soft surfaces, it means ensuring correcting or replacing any loose tack strips or old metals to ensure your carpet job runs smooth and stress free. For hard surfaces, flattening, sealing, and prepping ensures your floor has a good base before the flooring is floated or adhered into place.

Phase Two

Phase two is the actual installation process of the floor. This is where the carpet is unrolled and moved into place. This is where the tiles are laid out to reveal their final pattern. This is where wood planks are worked together and locked into place.

Phase Three

Finishing is often just as important as the installation. Properly installed baseboards, quarter round, T moldings, thresholds, and other trim makes the difference between a DIY look and a professional one. This is what creates ambiance from the floor up. Yes, you can tell if transitions aren’t appropriate from room to room. Proper moldings create a half finished look.

While phase two can be accomplished by just about anyone, it’s phases one and three that set people apart. They are what ensure your job will keep your floor looking its best for years to come.

Read More
  • Flooring, Hardwood Flooring
  • April 18, 2017

Why Can’t I Install My Hardwood Flooring Myself?

They make it look so easy, don’t they?

Slap a few boards together with a few staples and – voila – your floor is installed. Yet the process is much more complicated than all of that. And in certain climates and conditions, it can add an extra layer of difficulty.

Your flooring will be intact for years. It will take a lot of abuse from traffic and the elements of day to day living. It can look great through most of its life, or quickly take on a disheveled look and feel. Why Can’t I Install My Hardwood Flooring Myself?

Fixing mistakes is not easy if you make a mistake

Unlike painting a wall, fixing a board that warps or doesn’t fit quite right is much more difficult. Not only will you have to have the proper wood, the proper cut, and the proper stain, you’ll also have to ensure there isn’t more to the problem. If you make a mistake, it can be timely and costly as you replace anything from one single board to the entire room.

Special tools to ensure proper installation

It takes a lot more than a hammer and nails to do the job properly. You’ll need a variety of power and hand tools throughout the installation process. We use:

  • Saws of all types: circular, table, jig, miter
  • Glue adhesives
  • Leveling tools
  • Air compressors
  • Nail guns
  • Staplers
  • Sanders
  • Buffers
  • Adhesive removers

Depending on the installation process, you may also need things like a hygrometer to test for moisture levels, as well as subfloor and underlayment tools and products to ensure proper working conditions.

Extra knowledge for the “just in case”

Every job is different. And when you have experience working with flooring, you learn quickly how to deal with things as they arise. As a DIYer, you’ll be working from scratch without having any prior knowledge of the special occurrences you may run across. Which means you may start making mistakes right from the start.

You need to know:

  • How to center a room
  • How much space should be left for gaps
  • How you transition from room to room
  • How to wrap around closets, fireplaces, staircases, etc
  • How to deal with problems that arise from the working conditions

The safest bet is to hire a professional to ensure the job is done the right way the first time.

Read More
  • Flooring, Hardwood Flooring
  • April 15, 2017

Getting Rid Of Tar From Your Hardwood Flooring

Have you ever had tar stuck to the bottom of your shoes? It’s a sticky mess.

It’s a substance found in nature originating from roots and woods, and is primarily used for sealing roofing shingles. You’ll also find it on the wooden hulls of ships to prevent them from rotting. In diluted form, you can also find it used as a spice for meat, candy flavoring, as an anti-dandruff agent, and even as a component in some cosmetics.Getting Rid Of Tar From Your Hardwood Flooring

And while it may be an important substance for some jobs, if you get it on your hardwood floors, you’ll discover how tough it is to remove.

When cleaning it off hardwood floors, it is important to carefully remove it so as not to damage the wood, especially if removing from exotic or reclaimed wood.

Tip #1 Use a Dull Scraper

The best tool for the job is a dull scraper to carefully remove the remnants. Select something like a popsicle stick or a plastic spatula. Never use something sharp as that can risk damaging the hardwood floor in the removal process.

Tip #2 Use Ice

You can also use ice cubes to freeze the tar before you remove it. Place a few ice cubes in a plastic bag and lay it on top of the tar. Wait for it to freeze and become brittle. Then it will be easy to remove the pieces in chunks.

Tip #3 Use A Scouring Pad

For stubborn tar stains, you can use a scouring pad to penetrate through the sticky substance. Select a scouring pad that has a fine grade to decrease your chances of impacting the hardwood in the process. Use small, circular motions and don’t apply a lot of pressure as you scrub on the mess.

Tip #4 Use Acetone

You can also use acetone to remove tar from laminated wood flooring. Dab a small amount of acetone on a clean cloth and wipe up starting at the edges of the stain and moving towards the center to avoid spreading the mess.

When in doubt, talk to the professionals to avoid doing permanent damage to your flooring.

Read More
  • Flooring
  • April 12, 2017

Quick Remedies For Your Wood Floor’s Worst Enemies

Have you ever dropped something to your hardwood flooring and instantly had an overwhelming feeling of doom? Instantly you know it’s going to leave its mark. Even quick action might not remove the unsightly stain from your hardwood flooring.

There is hope. Even with some of the stickiest, messiest substances that tumble to your floor on occasion, there are remedies which can help remove them.Quick Remedies For Your Wood Floor’s Worst Enemies

Chewing Gum – The quickest way to remove it is to freeze it until it is brittle enough to crumble. Place a few ice cubes in a plastic bag and allow the gummed area to freeze.

Crayon or Candle Wax – If you have a wax finish, use a brown paper bag over the crayon and heat an iron until the bag absorbs the stain. For polyurethane finishes, check with the manufacturer for recommended hardwood floor cleaners to help remove the stain.

Water Stains, Ink Stains, or White Spots – For wax finishes, rub with a fine steel wool dipped in wax. If the spot remains, rub with fine sandpaper, followed by steel wool dipped in mineral spirits. When the stain disappears, touch up stain to match color, apply wax and buff. For polyurethane finishes, check with the manufacturer for recommended hardwood floor cleaners to help remove the stain.

Grease or Oil Stain – For wax finishes, saturate a cotton cloth with hydrogen peroxide and place it over the stain. Follow it up with a cotton cloth saturated with ammonia, placing it on top of the first. Repeat as necessary. Let dry and buff with a clean cloth.

Heel Scuffs – With a wax finish, apply a small amount of wax with a fine steel wool. Rub and butt with a cloth until scuffs are gone.  For polyurethane finishes, check with the manufacturer for recommended hardwood floor cleaners to help remove the stain.

Wax Buildup – Remove old wax with a stripper made for wax. Do not use furniture stripper. Remove residue with steel wool and a soft cotton cloth. Let dry, then wax and machine buff to match the rest of your flooring.

What other mishaps have you found on your floor?

Read More
  • Flooring
  • April 9, 2017

Using Different Flooring Throughout Your Home

Your flooring is one of the most important decisions you’ll make when it comes to redecorating your home. While it’s relatively easy to paint a new color or install a new curtain, your flooring is something that will be a part of your decor for many years to come. You don’t want a haphazard look.

The link between flooring choices is to focus in on color. If your home’s color palette remains the same throughout, you’ll have an easier time making your final flooring selections. Obey the “rule of three”, which means you should only see up to three different types of flooring from any one point in your home. Using Different Flooring Throughout Your Home
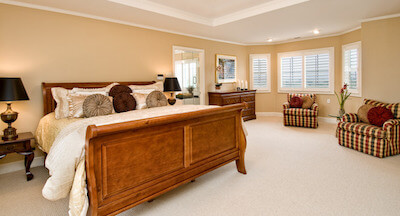
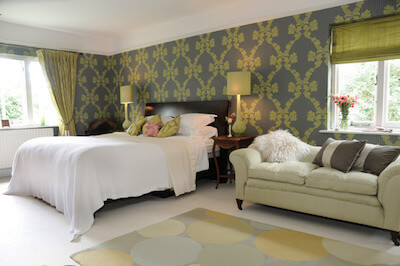
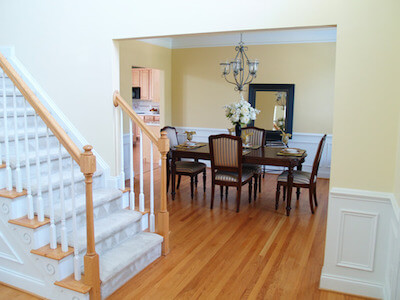
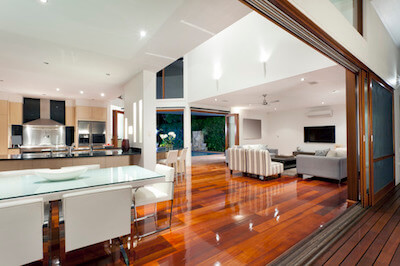
Variances in color choices should depend on the location of your rooms and the number of levels in your home. Your foyer should start the theme. Select a tile, stone, slate, wood or mosaic to mark the entry point, then use this color theme to blend from this point forward. If your house is small and on one level, laying one color and type will visually expand the living space.

Off the foyer, the living spaces can be sculpted carpet hardwood, cork, bamboo, tile or stone. The key is to match the color of the floor in the entryway as it flows from one to another. Ensure that it blends throughout.

Dining rooms should be practical; tile, stone or hardwood works best. With constant movement of chairs, and the possibility of stains from food and liquid that accidentally drop to the floor, durability is key.

Family areas will see your highest levels of traffic. This includes kitchens, bathrooms, and family rooms. While you may opt for carpeting in family rooms, all other high traffic areas are better suited for stone, wood, tile or laminate. Error on the side of a darker color to avoid stains and footwear. You should also be aware that water overflows can cause warping. Be diligent about cleaning up messes right away.

Bedrooms are a place where you can be the most creative, focusing in on softness over durability. Select a color that blends with every decor, especially as kids grow from toddlers into teens, and have changing abilities and habits.

Read More
  • Flooring, Tile Floors
  • April 4, 2017

Porcelain Tile For Indoor and Outdoor Use

Today’s homes are being reimagined right before our eyes. Sure, we like our space indoors. But here in Colorado, we value our outdoor space equally. And when the weather warms, and the sun shines longer into the evening, we want to be outdoors to enjoy the fresh air.

That means many homes are creating entertaining space that leads well beyond the four walls that make up your home. The kitchen opens up and extends into outdoor kitchen space, often including gourmet appliances that match in functionality and design.Porcelain Tile For Indoor and Outdoor Use

No more small grills sitting in the corner of the garden. Instead, you’ll find running water, refrigerators, even grill tops and warming ovens. So, of course, we want the look and feel from inside our homes to continue out to the outdoor space as well.

That means a continuous look from top to bottom.

Porcelain tile may be the perfect starting point.

If you choose the right porcelain tile, you’ll have a tile with a texture that creates slip resistance. It’s perfect for your outside living space that is subjected to water from sprinklers, rain, and snow.

But even though the texture is perfect for outside, doesn’t mean it doesn’t have a high quality look that’s perfect for inside too. The tile is beautiful for any room in your home. It’ll make a statement anywhere.

Porcelain tile comes in all shapes, sizes, and colors. We often recommend a larger tile to be used as the kitchen flows into outdoor entertainment areas because of the functionality. Larger tiles mean less grout. It creates a very elegant design when viewed in larger spaces.

Is porcelain tile the perfect option for your indoor/outdoor layout?

Read More
  • Carpet, Flooring
  • April 1, 2017

What To Expect From Natural Fiber Carpeting

In today’s world, we’re getting back to natural living. We see it in the foods we eat and the materials we use within our homes.

While most carpeting is made from at least some synthetic fibers, there are few choices that are entirely natural. However, you can find some beautiful carpet and rug choices that are made from eco-friendly renewable resources that will help you live as natural as possible.What To Expect From Natural Fiber Carpeting

Wool

Wool is one of the most natural fibers flooring choices used in both carpets and rugs. It’s strong, resistant to stains, resistant to piling, resistant to fire, and is naturally coated to resist small amounts of water. Wool is also a great choice to block cold air, as it has a natural insulation factor built into the fibers. This means it provides both sound and heat insulation.

Seagrass

Seagrass is a smooth anti-static carpet that is made from natural plant fibers. The seagrass plant grows similar to rice, which makes it a renewable, sustainable resource. The fibers are tough and impermeable, which means it’s a good choice for resisting stains, dirt, and discoloration. But just like the color won’t fade, it’s also difficult to color in the first place. You’ll have to settle for seagrass carpets in natural color selections. It is also susceptible to damage from moisture, so it isn’t a good choice in areas where it may be subject to mold or mildew.

Jute

Jute is another favorite that is manufactured from a plant which grows in the subtropical portion of Asia. The plant is soaked in water, and the stalks are harvested and stripped for make the fiber. It is most commonly used in making rope, and is often used as carpet backing. Jute is one of the softest and most inexpensive carpet fibers, which also makes it less durable and more susceptible to wear and tear.

Sisal

Sisal is a soft yet durable natural fiber that is easier to dye. That means it can hold up in higher traffic areas without being uncomfortable underfoot. You’ll find sisal carpeting in a variety of colors and patterns, and is perfect for use in any room in the home. However, it can stain relatively easy. It will require treatments to make is spill and dirt resistant.

Which is the right natural carpet choice for your home?

Read More
  • Carpet, Flooring
  • March 27, 2017

How Do Carpet Fibers Impact Your Flooring?

For many, the thought of having to replace your carpeting ranks right up there with visiting the dentist. It’s a necessary task that you put off until you absolutely have to replace.

Because of that, you might not realize all of the choices currently available to you. Carpet has changed a lot over the past twenty years. While we’ve seen a trend of moving from hardwoods, to wall to wall carpet, back to hardwood, there is a resurgence of carpeting being installed in homes.How Do Carpet Fibers Impact Your Flooring?

Before you head to the flooring center, get to know this people pleasing flooring choice a little more.

Carpet fibers can be broken down into two types: natural or synthetic.

Natural fiber is predominantly wool.

Synthetic is broken down into nylon, olefin, and polyester.

Wool has superior qualities over the other natural choices like cotton. Wool is very soft, something no synthetic fiber can match. However, wool tends to be at the top of the list when it comes to expense, and because of the fiber’s porosity, it will soak up moisture. That means it isn’t a good choice for basements, where flooding can occur, or in rooms where you anticipate spills and other moisture to be a problem.

Nylon is one of the most popular carpet choices on the market. Nylon is a synthetic fiber with excellent durability. You’ll find nylon carpet is often associated with different brand names – Stainmaster for instance. Nylon is a very strong fiber that is great for high traffic areas, will retain moisture well and dries out quickly if it does get wet. If also manages to stay fairly static-free. On its own, it doesn’t resist stains very well, which is why stainblockers are often added.

Olefin is one of the cheaper carpets on the market, but has lost its prevalence over the years as new and improved materials have been developed. One of the downsides is its low melt point, which puts it at more risk in the home.

While polyester can’t match the durability of nylon, it is one of the best carpet fibers to take dye, and thus produce beautifully colored carpets with superb fade resistance.

So which is the right carpet choice for you? Stop by today and let us help you decide. You’ll love the look.

Read More
  • Tile Floors
  • March 25, 2017

Subway Tile In Glass, Travertine, Marble, and More

Think subway tile only comes in ceramic? Think again. Because of its increasing popularity, subway tile comes in all kinds of materials, colors, shapes, and sizes. And because of it, you can create any design you’ve been dreaming of.Subway Tile In Glass, Travertine, Marble, and More

Subway tile gets its name from being the decor choice on subway platforms. These ceramic tiles were durable, easy to care for, and easy to replace. And while they are fairly standard in color and size, as people started bringing them into their homes, the changes became more significant.

Like glass. Traditional subway tiles are standard 3×6 in size. But they’ve grown (and shrunk) from there to provide a wonderful range of textures and looks. You’ll find clear glass, texture to give the impression of a linen design, or muted color to blend into the surroundings. Glass brings a bit of shine and shimmer to any location you choose to install. We love how you can use it sparingly to add punch to a room, or install it from floor to ceiling for a clean look and feel.

Subway tiles can also be created from travertine. Travertine has been around for centuries and looks great wherever it’s installed. So why not mix it up with a subway theme? And while many people choose to stick with a theme and install a solid wall of travertine, we also like mixing it with other tiles – like glass. Sticking with a color theme and hue will ensure they work well together, giving you a look you’ll love for years.

If durability and elegance are high on your wish list, look no further than marble subway tiles. These elegant tiles are generally polished, and look great in showers, tubs, or backsplashes. You can also use them to build intricate mosaic or designs. Your imagination can run wild when implementing this high quality look to any room in your home.

Want something more cutting edge for your urban home? Why not bricks? Bricks have low maintenance and can give you a traditional appeal that perfectly matches your urban decor. Not only can you use these on the floor, but they can run up the wall and become your main feature.

What subway tile will you choose?

Read More

Recent Posts

  • The Benefits of Eco-Friendly Carpet Choices
  • How Flooring Can Transform Your Home’s Entryway
  • Choosing Flooring That Adds Depth to Small Spaces
  • The Role of Flooring in Boosting Energy Efficiency
  • How to Coordinate Hardwood Flooring with Cabinet and Countertop Colors

Categories

  • Area Rugs
  • Carpet
  • Flooring
  • Flooring
  • Hardwood Flooring
  • Tile Floors
  • Uncategorized
  • Vinyl Floors

Posts pagination

« 1 … 65 66 67 … 89 »

Copyright © 2023 PRO! Flooring. All Rights Reserved.