• Call or Text: 303.788.0113
Blog
  • Home
  • Residential
  • Commercial
  • Our Showroom
  • Blog
  • About
    • Frequently Asked Questions
  • Contact
    • Write a Review
  • Home
  • Residential
  • Commercial
  • Our Showroom
  • Blog
  • About
    • Frequently Asked Questions
  • Contact
    • Write a Review

Blog

  • Flooring
  • March 4, 2015

Can You Repair Vinyl Flooring?

If you own a home here in Colorado, chances are you have vinyl installed in at least one of the rooms. Why? Because vinyl is one of the most versatile, most durable, most affordable flooring options you can buy.

And with today’s choices, you can have any look or feel in any room you choose. Today’s vinyl is not what you remember from your parent’s home long ago. Today’s vinyl can provide style and finesses, yet at the same time give you worry free durability that will make cleaning a snap – perfect for those hard to clean spaces, such as a bathroom or laundry room.Can You Repair Vinyl Flooring?

Yet while vinyl may be durable it isn’t indestructible. Pull a chair, a washing machine or a refrigerator across the floor and you may find a rip where the leg caught the vinyl in a wrong way. Drop a sharp object and it can easily go into the material and cause a snag. Or, if the vinyl isn’t laid perfectly over the subfloor, leaving space and variance between the two, a high heel can easily push right on through, causing a small puncture.

Nothing can be as disheartening as a small tear, especially if your vinyl is still considered new.

Fortunately, repairing vinyl flooring is almost as easy.

If your flooring is made up of vinyl tiles, the easiest way to repair it is to pull up the damaged tile and replace it with a new one. Be sure to order plenty of extras at the time of installation to have some on hand for repairs.

If your flooring is sheet vinyl, repairing the damage involves fusing the surface together again, or patching in new material.

Small cuts and scratches can be permanently fused with a liquid seam sealer. Stop by any time, we can provide you with a clear compound that is easy to use as a filler. Simply clean the area around the cut or scratch and let it dry. Then apply the sealer directly to the area and let dry.

For larger damage, such as a cut or burn, you’ll have to cut out the damaged area and glue in a replacement patch. When installed, ask your installer to leave leftover pieces of vinyl for repair work. Match up the pattern as best as you can, cutting both pieces to match. Next, remove the old vinyl and slide in the new, making sure the new piece fits into place perfectly. Once comfortable with the patch, glue it permanently into place. Place a piece of wax paper over the patch and place several heavy books on top for 24 hours to make sure it properly adheres. Once in place, seal it in around the edges.

The results will be nearly undetectable.
Read More
  • Uncategorized
  • February 26, 2015

Choosing Flooring When You Have Big Dogs

If you’re in the market for new flooring, you’ve probably had many thoughts on what type of flooring is best for you. A lot goes into making the final decision. What’s the best selection for the room? What will have the best wearability? What is your personal preference?

But if you have big dogs, dogs that are 100, 125, even 150 pounds or more, there is a lot more to consider before making that final decision.

What’s the best flooriChoosing Flooring When You Have Big Dogsng for big dogs?

While personal preferences still reign, there are a few recommendations we can make based on what we’ve heard from fellow big dog owners.

Hardwood

As much as Coloradans love hardwood flooring, if you have big dogs, its something to consider. Most hardwoods have softer textures, meaning they are easier scratched than other flooring choices. When a 150 pound dog walks across the floor day in and day out, you will begin to notice the evidence rather quickly. If hardwood is still your choice, factory finishes do offer a level of protection. When refinishing, make sure you use several layers of polyurethane as a coating – you can get a similar finish that will match what is used with laminates. While not perfect, they do protect better than other types of finish.

Laminate

Laminate tends to be one of the best choices for big dogs, if you want to keep the wood look throughout your home, because of its hardness and its protective coating. It has scratch resistance built in, and is a very durable and easy to maintain product. However, keep in mind that laminate does have a slippery surface, which can make it difficult for big dogs – especially older dogs – to get up off the floor. Warping can also be an issue if your dog splashes water from the dog bowl, or drools throughout your home and the water isn’t cleaned up in a timely manner.

Ceramic

Ceramic tile is another great choice for big dog owners. Ceramic tile provides a hard surface that will withstand all kinds of daily abuse. When choosing ceramic tile, make sure you take into consideration how much time your dog will spend on the surface. Tile can be slippery when getting up and moving around, so its important to pick a tile that has a duller and easier to grip surface. Dogs do love the cool surface of tiling when the weather turns warm.

Carpet

Carpet and dogs have their issues. However, especially with an older big dog, carpeting is soft to the touch, easy to lie on, and easy to get up and move around on. If you do use carpeting in a room frequented by your big dog, keep in mind that you will have to clean it more frequently than you would in normal circumstances. A daily vacuum run will pick up debris and dirt tracked in from paws. A regular cleaning schedule will get rid of odors and stains that can grow rapidly simply from daily use. And keep in mind that you will be replacing your carpets on a much sooner time schedule than you would under normal conditions.

Read More
  • Flooring
  • February 21, 2015

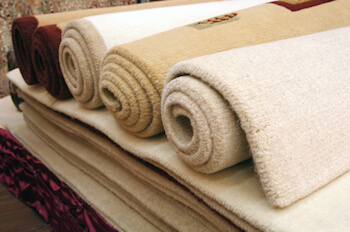
The Difference Between Hand Woven and Machine Made Rugs

How do you tell the difference between hand woven and machine made rugs?

To the untrained eye, it can be difficult to tell the difference.

A hand knotted rug is made on a specially designed loom and are knotted by hand. The size of the rug is determined by the size of the loom. The rug weaver inserts the knots into the backing of the rug and then are tied by hand. This creates the pile of the rug. It is a very tedious and time consuming process. A rug created with intricate details can take months or even years to finish.The Difference Between Hand Woven and Machine Made Rugs

Hand knotted rugs can be made from a variety of fabrics, including wool, cotton, silk, jute and other natural materials. Also called Oriental rugs, hand knotted rugs are often of collectible quality, with prices being affected by a variety of things, including knot count, quality of yarn, dye process, etc. While hand knotted rugs typically will cost more, because of the quality they will also have a longer life span, giving you more value for your money.

Machine rugs are made by large mechanical power looms. A power loom is automated and controlled by computers. Machine rugs can be made with all kinds of materials, including wool, synthetic fibers such as nylon, polyester, acrylic and silk, and can by made quickly and efficiently.

Machine rugs can simulate the look and feel of a hand knotted rug. However, machine rugs usually have a life span of about 20 years or less depending on its construction. Machine rugs, in general will not have any value to a collector, though certain brands such as Karastan do have a loyal following.

One of the best ways to tell the difference between a hand knotted and machine made rug is to look at the back of the rug. With a hand knotted rug, the weaving and the knots will be slightly uneven and not perfectly uniform. A machine rug will have a uniform look and perfectly straight rows. The more detail you can see in the design from the back of the rug, the higher the quality of the rug.

Another way to determine the difference is to look at the fringe. The fringe of a hand knotted rug is an extension of the rug foundation. With a machine rug, the fringe is sewn on and attached as a finishing touch.

Have additional questions about rug quality? Stop by and see our many rug styles, and learn which is the right choice for your home.

Read More
  • Carpet, Flooring
  • February 17, 2015

How Well Is Your Carpet Made?

What gives carpeting its durability, its longevity, and ensures that it will look good and wear well in the years to come? There are many factors that go into carpet construction, each playing a role in the process: Carpets consist of:

  • FiberHow Well Is Your Carpet Made
  • Backing
  • The latex used to hold the backing together
  • Density of pile
  • Pile weight
  • Twist of the fiber
  • Finishing
  • Stain resistance
  • Dye method

Each part of the process plays a role in the durability. For instance, the best backing material wouldn’t give carpet strength if weak fibers were used in the process. While each plays a role, there are a few things you can look for when shopping for new carpets for your home.

Most carpeting is tufted or punched through the backing with a series of needles. Backing is a layer of material sandwiched together using latex glue. Fiber is pushed through the secondary backing, held in place with latex glue, and finished by the primary backing which holds the carpeting together. While the backing plays an important role, the glue will also determine the longevity. If the latex fails, the two backings will delaminate over time, causing the fibers to release and begin to fall out.

Most backing materials are a weave of plastic materials, but foam rubber, urethane and jute are also involved in the carpet making process. Foam rubber is often used in kitchen or indoor/outdoor carpeting and provides the cushion-like feel. Urethane holds fibers tighter and bonds the fibers to the backing, decreasing the risk for delamination. Jute is a superior backing, and was often used in decades past. However, the US is not able to import jute on a regular basis, and therefore you’ll usually only find jute in carpeting such as heavy berber or some wool carpets.

When shopping for carpet, you will find terms like “weight, density and twist”. These refer to the construction of the carpet’s surface.

Weight is the amount of fiber on the surface of the carpet expressed in ounces per square yard. Never buy carpet based on weight alone.

Density refers to how close together the strands of fiber are together at the base of the carpet. Density effects how the carpet is going to look and perform.

Twist level is the amount of twist the fibers are given during the time of construction. The more twist a carpet has, the less dense the carpet has to be, and can even impact the amount of fiber necessary during production.

A short, tight twist carpet is called a frieze, and is known to be the best wearing style of carpet outside of a loop pile, which you’ll often find in commercial carpets.

After production, finishing work is completed to give your carpets the final look and its durability factor. If the fibers are not crimped, the are sheared several times, and will eventually take on a velvet appearance (a super dense construction), a plush (less dense), or a saxony (even less dense construction). Velvets are formal and tend to show the most footprints and marks as you move across the floor. Plush are not as tight as the velvet construction, will still feel thick to the touch, and typically come in solid colors.

Some sort of stain treatment is added to virtually all types of carpeting today. However, there are no miracle stain treatments. Most treatments will wear off in five to seven years, leaving your carpeting more at risk as time goes by.

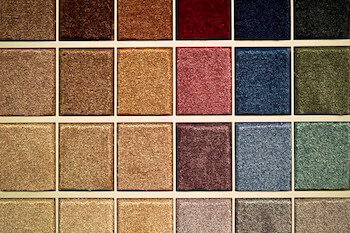
There are no right or wrong choices when it comes to choosing carpeting for your home. With many styles, options and durability factors, it depends on your tastes and how much traffic your room will ultimately receive. If you have any questions, we’d be happy to help you see the differences in the many samples we have on display.

Read More
  • Flooring
  • February 14, 2015

Installing Hardwood Floors On A Concrete Slab

“I have an older trilevel home. I’ve read that hardwoods aren’t a good choice for basements because of the moisture content, but what about my main level? The main level has a kitchen, dining room, living room and bathroom, all on a concrete subfloor. Can I install hardwood, or is it still risky?”

Homes built on concrete slabs are good candidates for hardwood flooring, providing the slab doesn’t have too much moisture. Too much moisture and humid conditions can cause wood to buckle, warp or crack as the wood expands and contracts with changes in the moisture level. Which means its important to understand your subflInstalling Hardwood Floors On A Concrete Slaboor before making your final decision.
A professional can help you take a moisture reading of your subfloor. Another test you can use is to mark off a 12×12 section on your concrete subfloor. Tape a clear polyethylene plastic sheet over the area and secure completely with duct tape. Leave the plastic in place for about 24 hours. If the plastic is clear with no droplets of water of any signs of moisture, you can install wood over your concrete slab.

In most cases, when your home builder constructed your home, they used a vapor barrier underneath the concrete slab. This helps moisture buildup in the concrete; yet concrete naturally has some moisture in place. For further protection, a vapor barrier should also be placed between the concrete slab and your hardwood floors. Sheets of polyethylene plastic overlapped and taped into place is one method; another is painting the slab with a moisture sealant.

Hardwood flooring is typically installed in one of two ways: nailing them to the subfloor, or gluing the flooring planks into place.

For nailing, a subfloor will be installed over the concrete. Sheets of ¾ inch pressure treated plywood can be layed over the moisture barrier, or you can also lay down lengths of pressure treated 2 x 4 studs over the moisture barrier, followed by ¾ inch plywood as your base. The studs keep the wood planks further from the slab and minimize the effects the concrete will ultimately have on the final flooring.

Gluing the wood planks directly to the slab is the second installation method. A waterproof membrane over the concrete slap will act as a barrier against future moisture problems. After the sealant has dried, apply specially prepared adhesive, and work in sections to install wood planks. The adhesive dries quickly, so you have to work fast. Wood planks use a tongue and groove locking system; once the planks are in place, simply tap with a rubber mallet to seal them in.

Have additional questions about a hardwood floor over a concrete slab? Stop by or give us a call today. We’d be happy to answer all of your questions about flooring and more.

Read More
  • Flooring
  • February 10, 2015

How To Install Laminate Flooring On Concrete

“I have a concrete subfloor in my walkout basement. Work is just about complete on the refinishing process, and I have my heart set on laminate flooring throughout. Does laminate work with a concrete subfloor? Anything in particular we should know before installation?”

Laminate flooring is a great choice for a walkout basement. Its durable, easy to maintain, will provide years of wear in an area of your home that is bound to get a lot more use in the coming years.

And while laminate flooring does work well over a concrete floor, there are a few things to keep in mind throughout the process.How To Install Laminate Flooring On Concrete

First of all, laminate flooring will only work on a concrete subfloor if the slab has a low moisture level. Too much moisture will quickly warp your laminate, which means you’ll be replacing it quickly. Before you install, make sure your concrete slab has cured for at least 30 days. Then test the slab with a moisture meter to be sure it has an acceptable moisture reading; check with the guidelines on the instructions that come with the laminate. You’ll usually find that the moisture reading can be no more than a 4.5 percent.

Keep in mind that concrete always gives off some moisture, so you’ll have to install a vapor barrier between the concrete and the laminate for full protection.

Once you’ve determined the moisture level is acceptable, its time time to level the surface of the concrete subfloor. If you’ve ever walked on laminate floor and heard squeaking, its due to an unlevel subfloor.

While a subfloor will rarely be completely level, a good rule of thumb is to not have more than 3/16th of an inch discrepancy in a 10 foot span of space. If you find unlevel spaces, mark the areas where the discrepancy exists, and use a grinder to level out your work space for high spots, or use a trowel to spread leveling compound over the lows. Be sure to thoroughly clean the area and allow the compound to completely dry.

Once your concrete is settled, its time to install a vapor barrier and finish preparing your subfloor. Depending on recommended installation from the laminate manufacturer you’ve chosen, they may suggest installing an underlayment of foam sheeting to add additional stability and support once the laminate is in place.

Before installing your laminate, allow the cartons to settle into the room and acclimate to the humidity level for at least 2 to 4 days before installation.

Have additional questions? Give us a call. We would be happy to help you with all of your laminate flooring needs.

Read More
  • Flooring
  • February 7, 2015

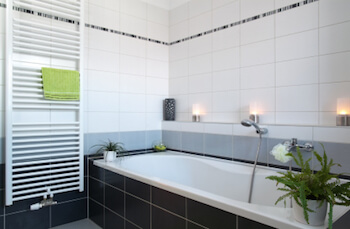
Bathroom Remodel: Top Tile Trends You’re Going To Love

One of the easiest rooms in your home to remodel is the bathroom. Start with the half bath off your main living area. With a little bit of work and a splash of creativity and style, you can have a beautiful look in just a few days.

Then once you have your creative juices flowing, you’ll have the resourcefulness to tackle bigger projects – like the master bath spa you’ve been dreaming about, or the basement bathroom that needs a complete makeover from top to bottom.Bathroom Remodel: Top Tile Trends You’re Going To Love

While bathroom remodels may be easy to accomplish in just a few days, the one thing that can hold you back is the decision on the best materials for the job. With so many options available to you – from flooring choices on up – where do you start?

How about with one of the top trends in a bathroom remodel – tile?

Tiling has always been one of the perfect choices for bathrooms because of its durability, its classic good looks, its easy to maintain qualities, and its budget friendly pricing. Why not give these trends a try?

Color

Neutral tiles may be the rage right now, but they’re anything but boring. Once you have tiling in place, you can continue to accent your bathroom with paint and décor. But it all starts with the tiles. Think beiges and tans. Or maybe a few shades of grey. Add in some white for contrast and you’ll have a color palette you can work with for years.

Don’t like neutrals? Want to go big and bold? You’ll find plenty of options with every color of the rainbow as well. When using color, be sure to mix and match for dramatic effects. Also, remember darker colors tend to make space look smaller, while lighter colors tend to open a room up. While the final choice is purely personal, if you want some design tips, just ask your flooring consultant for a few tips.

Size

No matter how you’ve previously defined tiles in the past, you’re sure to find something new when you begin your hunt for the perfect tile. One of my favorite tiles right now are thin strips of marble; when used in shower stalls or as backsplashes over your counter space, it can create a dramatic look and feel. But if you don’t want to go small, no problem, go big instead. You’ll find tiny tiles perfect for a mosaic design, all the way up to large stone tile perfect for a smooth and clean look for your bathroom floors.

Shape

If tile has always been synonymous with square in your mind in the past, its time for a change. Today’s tiles come in all kinds of sizes and shapes. You’ll love the traditional square shapes that come in every size imaginable. But you’ll also find yourself leaning towards modern updates that make it refreshing and new. How about classic circles that will give your bathroom pizazz? Or look for a classic hex design, when mixed with different colors can create a dramatic pattern throughout your bathroom.

Material

Think porcelain. Think marble. Think ceramic. Think glass. Today’s tiles are made from a variety of products. But more importantly, they are made to provide you with durability, a beautiful look at amazing prices.

Ready to get started on your bathroom remodeling project? Stop by today and find the perfect tiles for you.

Read More
  • Flooring
  • February 3, 2015

Using Flooring To Improve The Flow Of Your Ranch Home

Have you ever been inside a home that just doesn’t feel right? It feels a bit choppy, like there isn’t an automatic flow from room to room? That’s no accident.

How to Improve the Flow of Your Ranch Home with Flooring

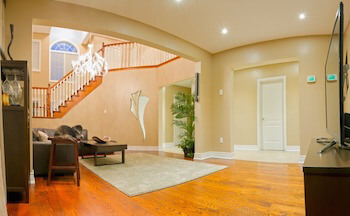
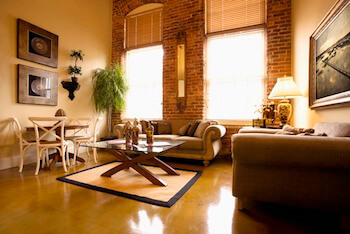
There is an art form to creating a look that welcomes you as you move from space to space, room to room. And it all starts with the floors. Foundational elements – walls and flooring – set the stage for how a ranch house feels. Once you get those things right, the décor you choose will simply help everything fall into place.

Using Flooring To Improve The Flow Of Your Ranch HomeWhile every home may need special care in creating the right flow, ranch homes have unique challenges because all of your living space is on one level. To make bedrooms work with hallways, bathrooms work with living space, and great rooms work with kitchens, takes a special knack and talent to find the right look. After all, traffic flow in a kitchen is distinctly different than traffic flow to a bedroom. But if the master bedroom is down a hallway just off the kitchen, how do you make it work seamlessly?
Tip #1: You don’t have to use the same flooring throughout your home

While using the same flooring choice throughout your home can create a uniform look and feel, it isn’t necessary. Some people love the look of hardwood and want it to flow from front to back, side to side. It’s a great way to keeping things uniform. But if you prefer softer, warmer bedrooms, why not transition from hardwoods to carpeting? The key here is to keep transitions parallel in like rooms. For instance, hardwoods may be installed throughout your home, but if you love carpeting, install the same color palette and style in the bedrooms. It will allow uniformity as you are moving down the halls.

Tip #2 Focus on the floor transitions

If you love wood in the main rooms, tile in the bathrooms, and carpeting in the bedrooms, go with your preferences. The key is to focus in on how the transitions occur from room to room. An ugly gold bar tacking carpeting into place can be an eyesore. By upgrading the materials and giving it a natural transition, you’ll immediately add to the value of your look, and make it blend better overall.

Tip #3 The rule of three

A simple tip to remember is the rule of three. When you stand in any spot in your home, at any given time you should never see more than three forms of flooring. With more than three, a home tends to look busy and complicated. Remember, less is more. Also make sure the transition is visually pleasing, and colors work from room to room.

Tip #4 One choice = boring?

Some people are afraid to use the same flooring choice from room to room, front to back. Will a house look too boring, too mundane? Usually, when people use one flooring throughout their homes, they settle on hardwoods, laminates, or in some cases tile. With the versatility and easy maintenance these choices offer, they can be a great choice. They also provide you with options. If you want to break things up and add color, choose rugs. They come in all shapes and sizes, and can provide just the look you are trying to achieve, while still maintaining a pleasing foundation that will add value for years to come.


About Pro Flooring Brokers

We are a one stop shop for all of your flooring and installation needs. Located in Denver, CO, we have been family owned and operated for over 30 years! Our passion is your project.

Have a Flooring Project in the Denver Area?

Commercial and residential customers love our huge selection of carpet, hardwood, porcelain tile, natural stone, luxury vinyl tile/planks, laminate flooring, and sheet vinyl flooring. Check out our products to learn more. Visit our showroom, meet our team, and let’s start your flooring project together. We offer:

  • Complimentary on-site measuring
  • Flooring estimates based on floor plans or blueprints
  • Installations performed by trained and qualified installers
  • Full one-year guarantee on all workmanship (in addition to manufacturer’s warranty)

Flooring and installation are made easy with the PRO! Flooring Brokers. Contact us, visit our showroom, or call today at 303.788.0113. We look forward to helping you.

Read More
  • Flooring
  • January 31, 2015

How Long Will Laminate Flooring Last

“I just bought a house, and want to replace the flooring on the main level. I love wood, but I know I can’t afford it in my current budget. I’ve been contemplating laminate flooring, but don’t know much about it. Will it give me the look and functionality of wood flooring? How long will laminate flooring last? Is it a great choice for main floor living space?”

Moving into a new-to-you house is an exciting endeavor. While you can take advantage of a lot of the upgrades owners have made before you, it also gives you room to play and put your own mark on your home. And while a lot of older homes still use other flooring products such as carpeting and vinyl, a lot of Colorado homeowners want the look of wood. And today’s laminate gives you options to have the real wood look, with lots of other benefits.

How Long Does Laminate Flooring Last
How Long Will Laminate Flooring Last

First of all, laminate flooring is more budget friendly than its real wood counterpart – you’ve probably noticed that if you’ve looked at all. Laminate flooring consists of several thin layers of material pressed together, along with a printed paper layer that gives it the look of wood, followed to a protective clear coat that seals the look together and gives it its strength.

Average lifespan of laminate

The average life span for laminate flooring is anywhere between 15 and 25 years, but of course can vary from 10 to 30 years depending on use and traffic. The difference also depends on:

  1. Quality of flooring
  2. Maintenance routine
  3. Proper installation
  4. Amount of foot traffic

Don’t use the wrong chemicals to clean you laminate

You can also affect your flooring by using the wrong types of chemical cleaners, or if you don’t wipe up spills immediately, allowing them to penetrate into the backing itself.

Laminate provides you with one useful life; it can’t be sanded and refinished again and again like a hardwood floor can. Once the top layer wears away, laminate must be replaced.

A few pros; a few cons. But overall, if you are looking for a beautiful flooring option with a budget friendly price tag, and want it to provide easy wearability throughout its life, you can’t go wrong with laminate. Its used all across homes in the Denver Metro area, and most would agree it was the perfect choice.

Is it the right choice for you?


About Pro Flooring Brokers

We are a one stop shop for all of your flooring and installation needs. Located in Denver, CO, we have been family owned and operated for over 30 years! Our passion is your project.

Have a Flooring Project in the Denver Area?

Commercial and residential customers love our huge selection of carpet, hardwood, porcelain tile, natural stone, luxury vinyl tile/planks, laminate flooring, and sheet vinyl flooring. Check out our products to learn more. Visit our showroom, meet our team, and let’s start your flooring project together. We offer:

  • Complimentary on-site measuring
  • Flooring estimates based on floor plans or blueprints
  • Installations performed by trained and qualified installers
  • Full one-year guarantee on all workmanship (in addition to manufacturer’s warranty)

Flooring and installation are made easy with the PRO! Flooring Brokers. Contact us, visit our showroom, or call today at 303.788.0113. We look forward to helping you.

Read More
  • Flooring
  • January 29, 2015

Plank Vinyl – Why It’s A Top Choice For Your Floors

You love the look of a plank wood floor. But your lifestyle dictates that real wood would be a mistake. What do you do?

Invest in plank vinyl flooring instead.

Over the past few years, plank vinyl flooring has skyrocketed in popularity for this very reason. Plank wood gives a fresh, unique look to your home. And with today’s technology and manufacturing options, vinyl options have greatly improved, converting even the most sophisticated buyers with its look and feel.Plank Vinyl – Why It’s A Top Choice For Your Floors

The best place to start is by comparing. If you’ve never looked at plank vinyl before, come in and view it with your own eyes. Compare it to real plank wood, laminate, and even to ceramic or porcelain tile. Different materials bring on different characteristics, so its important to understand how it will look as a finished product.

Overall, plank vinyl will be comparable in price to ceramic or porcelain tile. However, you won’t have the extra cost of thinset and grout, which can give plank vinyl the cost benefit. Its also comparable in price to laminate, depending on the style and brand you choose.

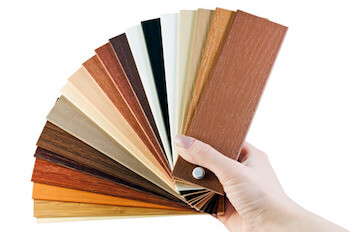
Vinyl plank flooring comes either with self-stick backing that sticks together as opposed to clicks, or in click and lock format. Like most flooring option, cheap isn’t better, and in fact can have you replacing your flooring in a fraction of time as upgrading your investment even a small amount. By investing a little more, you can find vinyl plank flooring with single board installation, mimicking the look and feel of real wood. Each plank reproduces the look of a single board, and clicks together to form a harmonious look and feel throughout your room.

When you’re ready to move forward, you’ll find vinyl planks in many sizes. In terms of width, you’ll find width in the 6” to 7 ¾” range, perfect for mimicking the look of a real wood plank board. Length will typically be around 48”, which can be considerably shorter than real wood, which can run as long as 12 feet long.

What makes vinyl realistic or not is its ability to be surface embossed. If you hold a vinyl plank at an angle, you will see texture that provides the look of real wood. Vinyl can take on all kinds of looks and textures, even heavily antiqued or distressed wood and hand scraped. Keep in mind the more texture, the thicker the plank should be in order to hold the pattern through and give it dimension.

Above all, vinyl plank flooring wins in heavy traffic areas, and areas where you may receive more water and moisture than others. It’s a perfect choice for entryways, hallways, and even kitchens and bathrooms.

Think vinyl plank flooring is the perfect choice for you? Stop by today and take a peek at your options. You will be surprised at how easy a choice this can be.

Read More

Recent Posts

  • The Benefits of Eco-Friendly Carpet Choices
  • How Flooring Can Transform Your Home’s Entryway
  • Choosing Flooring That Adds Depth to Small Spaces
  • The Role of Flooring in Boosting Energy Efficiency
  • How to Coordinate Hardwood Flooring with Cabinet and Countertop Colors

Categories

  • Area Rugs
  • Carpet
  • Flooring
  • Flooring
  • Hardwood Flooring
  • Tile Floors
  • Uncategorized
  • Vinyl Floors

Posts pagination

« 1 … 86 87 88 89 »

Copyright © 2023 PRO! Flooring. All Rights Reserved.